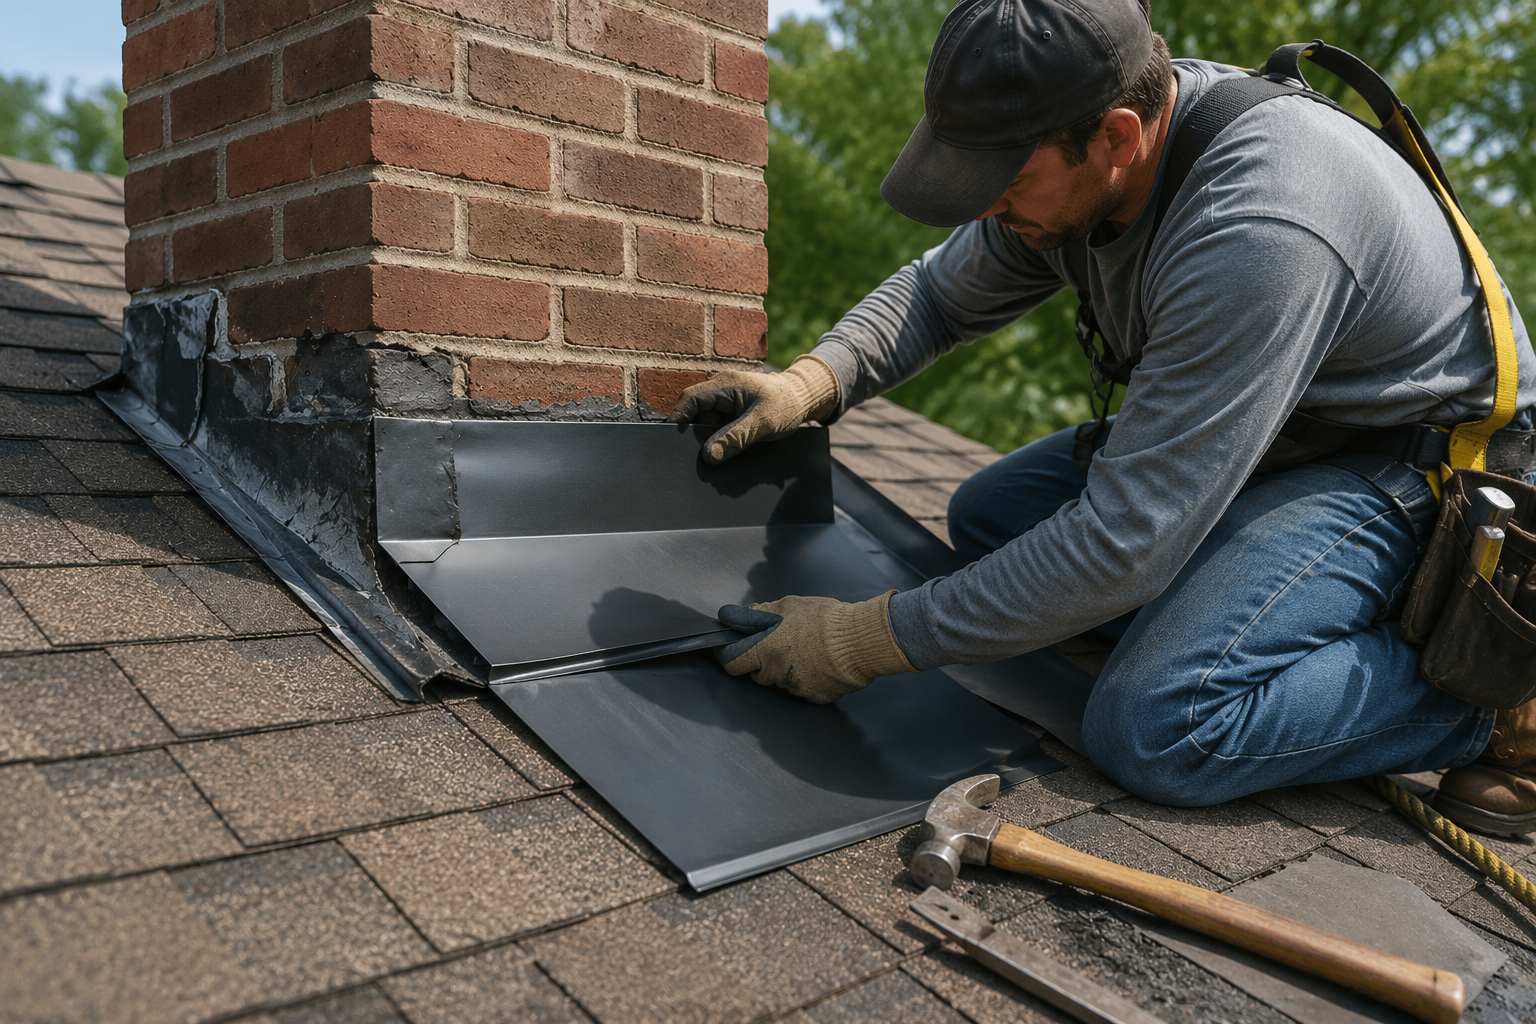
A chimney penetration is one of the most leak-vulnerable areas on any residential roof. Passing through the structural roof deck, a brick, stone, or stucco chimney creates a physical gap between rigid vertical masonry and sloping asphalt shingles. To bridge this gap and keep rainwater out, roofing contractors install chimney flashing—a specialized, multi-piece assembly of overlapping sheet metal designed to route water runoff safely around the structure and down the roof slope.
When water stains appear on interior ceilings near a fireplace, inside closets, or along chimney framing in the attic, homeowners and inexperienced handymen often resort to a quick fix: slathering thick layers of black roofing cement, silicone caulk, or rubberized spray over the metal joints.
While caulking can temporarily block a minor drip, caulk is not a structural repair. Caulk dries out, cracks, and fails under continuous weather exposure—often within 12 to 24 months—trapping moisture against wood framing and accelerating hidden structural decay.
This comprehensive guide details chimney flashing repair costs today, explains why sealant alone cannot fix failing metal, outlines the four core components of a watertight chimney flashing assembly, and helps you determine whether your chimney requires localized maintenance or a complete custom metal replacement.
The Anatomy of a Watertight Chimney Flashing System
To understand why caulk fails, you must first understand how a professional chimney flashing system operates. Rather than relying on adhesives or surface glues, a proper installation relies on gravity and overlapping metal layers to shed water.
                   CHIMNEY FLASHING SYSTEM ANATOMY

                |   |  <-- Masonry Chimney Wall
                |   |
        +-------+   |  <-- Counter (Cap) Flashing (Embedded in reglet joint)
        |           |
        |   +-------+  <-- Step Flashing (L-shaped, woven with shingles)
        |   |
     ===+===+========== <-- Roof Decking & Asphalt Shingles
        |   |
     [Apron Flashing]  <-- Base Flashing at downhill front edge
A complete, code-compliant chimney flashing assembly consists of four integrated components:
- Apron (Base) Flashing: An L-shaped metal sheet installed along the bottom (downhill) face of the chimney. The vertical leg sits against the masonry, while the horizontal leg extends over the shingles below to discharge water cleanly onto the roof surface.
- Step Flashing: Individual L-shaped metal cards (typically 3"x3" or 4"x4" right angles) installed along the sides of the chimney. Each piece is woven directly between overlapping courses of asphalt shingles as they progress up the roof pitch.
- Counter Flashing (Cap Flashing): The outer metal protective layer. The top lip of the counter flashing is tucked directly into a groove (reglet) cut into the brick mortar joints. It hangs down over the vertical legs of both the step flashing and apron flashing, acting as a watershed umbrella.
- Chimney Cricket (Saddle): A small, custom-built ridge structure installed behind the uphill side of any chimney wider than 30 inches. The cricket acts as a wedge, splitting water and snow runoff so it drains around the sides of the chimney rather than pooling behind it.
Why Caulk Is Not Enough Today: The Physics of Failure
Slathering roofing cement or exterior caulking over damaged flashing is a common band-aid, but it inevitably fails due to fundamental material physics.
+-----------------------------------------------------------------------+
|                 DIFFERENTIAL THERMAL EXPANSION DYNAMICS               |
+-----------------------------------------------------------------------+
| MASONRY (BRICK/STONE)  <-- Expands & contracts slowly                 |
| SHEET METAL FLASHING   <-- Expands & contracts rapidly under heat     |
| CAULK / ROOFING TAR    <-- Hardens, loses elasticity, & splits         |
+-----------------------------------------------------------------------+
| RESULT: Separated seams trap moisture against wood sheathing & deck.  |
+-----------------------------------------------------------------------+
1. Differential Thermal Expansion
Metal and masonry expand and contract at vastly different rates as temperatures fluctuate. Sheet metal reacts rapidly to direct sunlight and temperature shifts, expanding in summer heat and contracting in cold weather. Brick and mortar expand much more slowly. Caulk applied between these two moving surfaces undergoes constant shear stress, causing it to tear away from the brick within a few seasons.
2. UV Degradation
Roofing caulks and asphalt mastic compounds are organic polymers. Continuous exposure to ultraviolet (UV) radiation bakes out the elastic plasticizers in the sealant, turning flexible caulk into brittle, cracked crust.
3. Trapped Moisture and Hidden Rot
When surface caulk cracks, water penetrates behind the metal flange. Because the thick layer of caulk prevents air circulation and blocks natural evaporation, moisture remains trapped against the wooden roof deck and framing. By the time water stains appear on your living room ceiling, the structural plywood sheathing behind the chimney may already be rotted or mold-infested.
Chimney Flashing Repair Cost Breakdown Today
Chimney flashing repair costs vary based on chimney dimensions, roof pitch, accessibility, choice of metal, and whether surrounding brick mortar requires tuckpointing.
Average Chimney Flashing Cost Matrix
When reviewing proposals from roofing contractors, ensuring every phase of the repair is itemized helps prevent surprise charges. Review our detailed guide on how to read a roofing estimate to evaluate scope descriptions and line items effectively.
To verify that contractor pricing aligns with standard labor and material rates in your area, consult our breakdown of transparent roofing quotes.
Primary Cost Drivers for Chimney Flashing Projects
- Chimney Size and Configuration: A standard single-flue chimney (roughly 24" x 24") requires less metal and labor than a large multi-flue stone chimney (e.g., 48" x 60"), which demands extensive custom sheet-metal bending on-site.
- Roof Pitch and Accessibility: Steep-slope roofs (8:12 pitch or higher) or multi-story homes require specialized staging, safety harnesses, and scaffolding, which increases labor costs by 20% to 40%.
- Flashing Material Selection:
- Aluminum: Affordable, rust-proof, easy to form ($800 – $1,300 full job).
- Galvanized Steel: Rigid, strong, requires painted rust protection ($900 – $1,500 full job).
- Lead-Coated Copper / Pure Copper: Premium aesthetic, soldered joints, lifetime durability ($1,800 – $3,500+ full job).
- Condition of Masonry Mortar: If the brick mortar along the flashing line is crumbling or soft, new counter flashing cannot be anchored securely. Masonry tuckpointing must be completed before flashing installation.
Key Signs Your Chimney Flashing Needs Full Replacement
If you notice any of the following warning signs around your fireplace or attic structure, caulk is no longer an option—a full metal replacement is necessary:
- Ceiling Drywall Water Stains: Yellowish-brown rings on the drywall surrounding a fireplace breast or upper-floor ceiling indicate active water leakage along the chimney chase.
- Visible Rust, Corrosion, or Buckled Metal: Galvanized steel flashing that shows surface rust, lifting flanges, or open seams can no longer shed water effectively.
- Efflorescence on Attic Brickwork: White, powdery mineral deposits (efflorescence) on chimney bricks inside your attic indicate that water is soaking through the outer masonry wall behind failing counter flashing.
- Crumbling Mortar at the Reglet Joint: If the mortar holding the upper edge of the counter flashing has eroded, wind-driven rain will run directly down behind the metal layers.
- Multiple Layers of Black Tar or Caulking: If previous repair attempts have built up thick layers of cracked roofing cement, the underlying metal is likely corroded and must be stripped back to bare decking.
If you suspect water has leaked into your attic or ceiling framing, scheduling a comprehensive attic inspection will help locate hidden rot, damp insulation, or mold growth before damage spreads further.
Step-by-Step: How Professionals Re-Flash a Chimney
A lasting chimney re-flashing requires complete removal of old materials down to bare deck and clean masonry. Handymen who simply slap new metal over old flashing are setting your home up for premature failure.
1.Tear Off Surrounding Materials to Bare Deck:Step 1.Remove shingles, old metal flashing cards, and dried roofing tar within a 2-foot perimeter around the chimney structure to expose the bare wooden roof sheathing.
2.Cut Reglet Joints into Masonry Mortar:Step 2.Using a diamond-blade angle grinder, cut a horizontal groove (reglet) roughly 1 inch deep into the brick mortar joints along all four faces of the chimney.
3.Apply Self-Adhering Ice & Water Shield:Step 3.Install a continuous barrier of rubberized, self-adhering ice and water shield membrane. The membrane must extend at least 6 inches up the vertical brick face and 12 inches out onto the wooden roof deck.
4.Install Custom Apron and Cricket Metals:Step 4.Fasten a custom-bent metal apron flashing card along the bottom edge of the chimney. If the chimney is wider than 30 inches, install a framed, metal-clad cricket behind the uphill side.
5.Weave Step Flashing Cards with New Shingles:Step 5.As new asphalt shingles are laid along the sides of the chimney, weave individual step flashing cards under each shingle course, nailing each card exclusively to the roof deck (never into the masonry).
6.Insert Counter Flashing & Seal Reglet:Step 6.Insert the top hemmed flange of custom counter flashing sections into the ground reglet joint. Secure the metal with drive anchors, then seal the reglet channel with high-grade polyurethane or polyether masonry sealant.
Chimney Flashing Repair vs. Full Roof Replacement
When dealing with a leaking chimney, homeowners must weigh whether to repair the flashing as a standalone job or coordinate it with a broader roof overhaul.
+-----------------------------------------------------------------------+
|                    STANDALONE VS. RE-ROOFING COST SAVINGS             |
+-----------------------------------------------------------------------+
| STANDALONE CHIMNEY RE-FLASHING                                        |
| High Labor Overhead (Tear-back shingles & rebuild): $800 - $2,200     |
+-----------------------------------------------------------------------+
| RE-FLASHING DURING FULL ROOF REPLACEMENT                              |
| Reduced Labor Overhead (Deck exposed & shingles off): $400 - $800     |
+-----------------------------------------------------------------------+
| SAVINGS: Up to 50% on flashing labor when combined with re-roofing.  |
+-----------------------------------------------------------------------+
If your roof shingles are over 15 to 20 years old and nearing the end of their service life, paying $1,500 for a standalone chimney flashing repair may not make financial sense. During a full roof teardown, workers already strip away the surrounding shingles, lowering the incremental cost of custom chimney flashing to $400 – $800.
To evaluate whether your home needs an isolated repair or a complete replacement, review our cost-based guide on repair versus replacement.
If your shingles show widespread wear, granule loss, or storm damage, exploring a full roof replacement ensures your new chimney flashing is integrated into a complete, warrantied roofing system.
Preventative Maintenance: Extending the Life of Your Flashing
Once a custom chimney flashing system is installed, basic routine maintenance will ensure it lasts for decades:
- Inspect Reglet Caulk Every 3 to 5 Years: While step and counter flashing are held mechanically, the top reglet seal relies on elastomeric caulk. Inspect this sealant bead periodically and touch up any minor surface hairline cracks.
- Keep Chimney Valleys and Crickets Clear: Leaves, pine needles, and debris frequently collect behind chimney crickets. Clear trapped organic matter twice a year to allow water to drain freely.
- Waterproof Exterior Chimney Brick: Soft, porous brick absorbs rainwater, which can freeze and crack mortar around flashing. Applying a breathable, silane-siloxane masonry water repellent every 5 to 10 years protects exterior brickwork.
- Maintain Gutters Near Roof Penetrations: Ensure adjacent gutters and downspouts drain freely so water doesn't overflow near lower apron flashing edges. Installing heavy-duty gutter guards keeps drainage channels clear year-round.
Partner with Experienced Regional Roofing Specialists
Proper chimney re-flashing demands precise sheet-metal fabrication, masonry cutting skills, and a thorough understanding of water dynamics across roof pitches. Cutting corners with quick caulk fixes creates hidden moisture traps that lead to expensive structural repairs.
At The Roof Resource of East TN, we provide transparent estimates, custom-fabricated metal flashing, and certified roofing craftsmanship across every project. Whether you need isolated leak troubleshooting or a complete roofing system overhaul, our team delivers lasting protection backed by strong warranties. Explore our full range of specialized roof repair solutions to keep your home dry and secure.
Are you noticing water stains near your fireplace or rusted metal around your chimney? Contact our expert roofing team today to schedule a thorough inspection and receive an itemized repair estimate.
More Articles

Questions to Ask a Roofer: 20 Must Ask Items Before Signing Today

How to Compare Roofing Quotes: Apples to Apples Price Guide Today

Drip Edge Installation: Why Code Requires It in Many Areas Today in East TN

Best Roof Sealants for Leaks: Which Products Actually Last Today