Your home’s roof is a complex system engineered to shed water, handle extreme temperature swings, and protect the structural integrity of your living space. When most homeowners think about roof leaks, they picture missing shingles, cracked tiles, or dramatic storm damage. However, the most frequent culprits behind mystery ceiling stains and attic leaks are small, unassuming penetrations: your roof vent pipes.
Every home requires plumbing vents—often called plumbing stacks—to exhaust sewer gases and maintain proper air pressure within the drainage lines. Where these vertical pipes pierce your roof deck, a specialized flashing component called a vent pipe boot ensures the junction remains completely watertight.
Over time, constant exposure to UV rays, intense heat, freezing temperatures, and wind causes these boots to degrade, crack, and fail. If left unaddressed, a failed vent pipe boot can rot your roof decking, ruin your attic insulation, foster toxic mold growth, and cause thousands of dollars in drywall damage.
This comprehensive guide breaks down everything you need to know about roof vent pipe boots: how they work, why they fail, how to diagnose leaks early, a step-by-step DIY repair and replacement workflow, and when it is time to call a professional.
1. What Is a Roof Vent Pipe Boot?
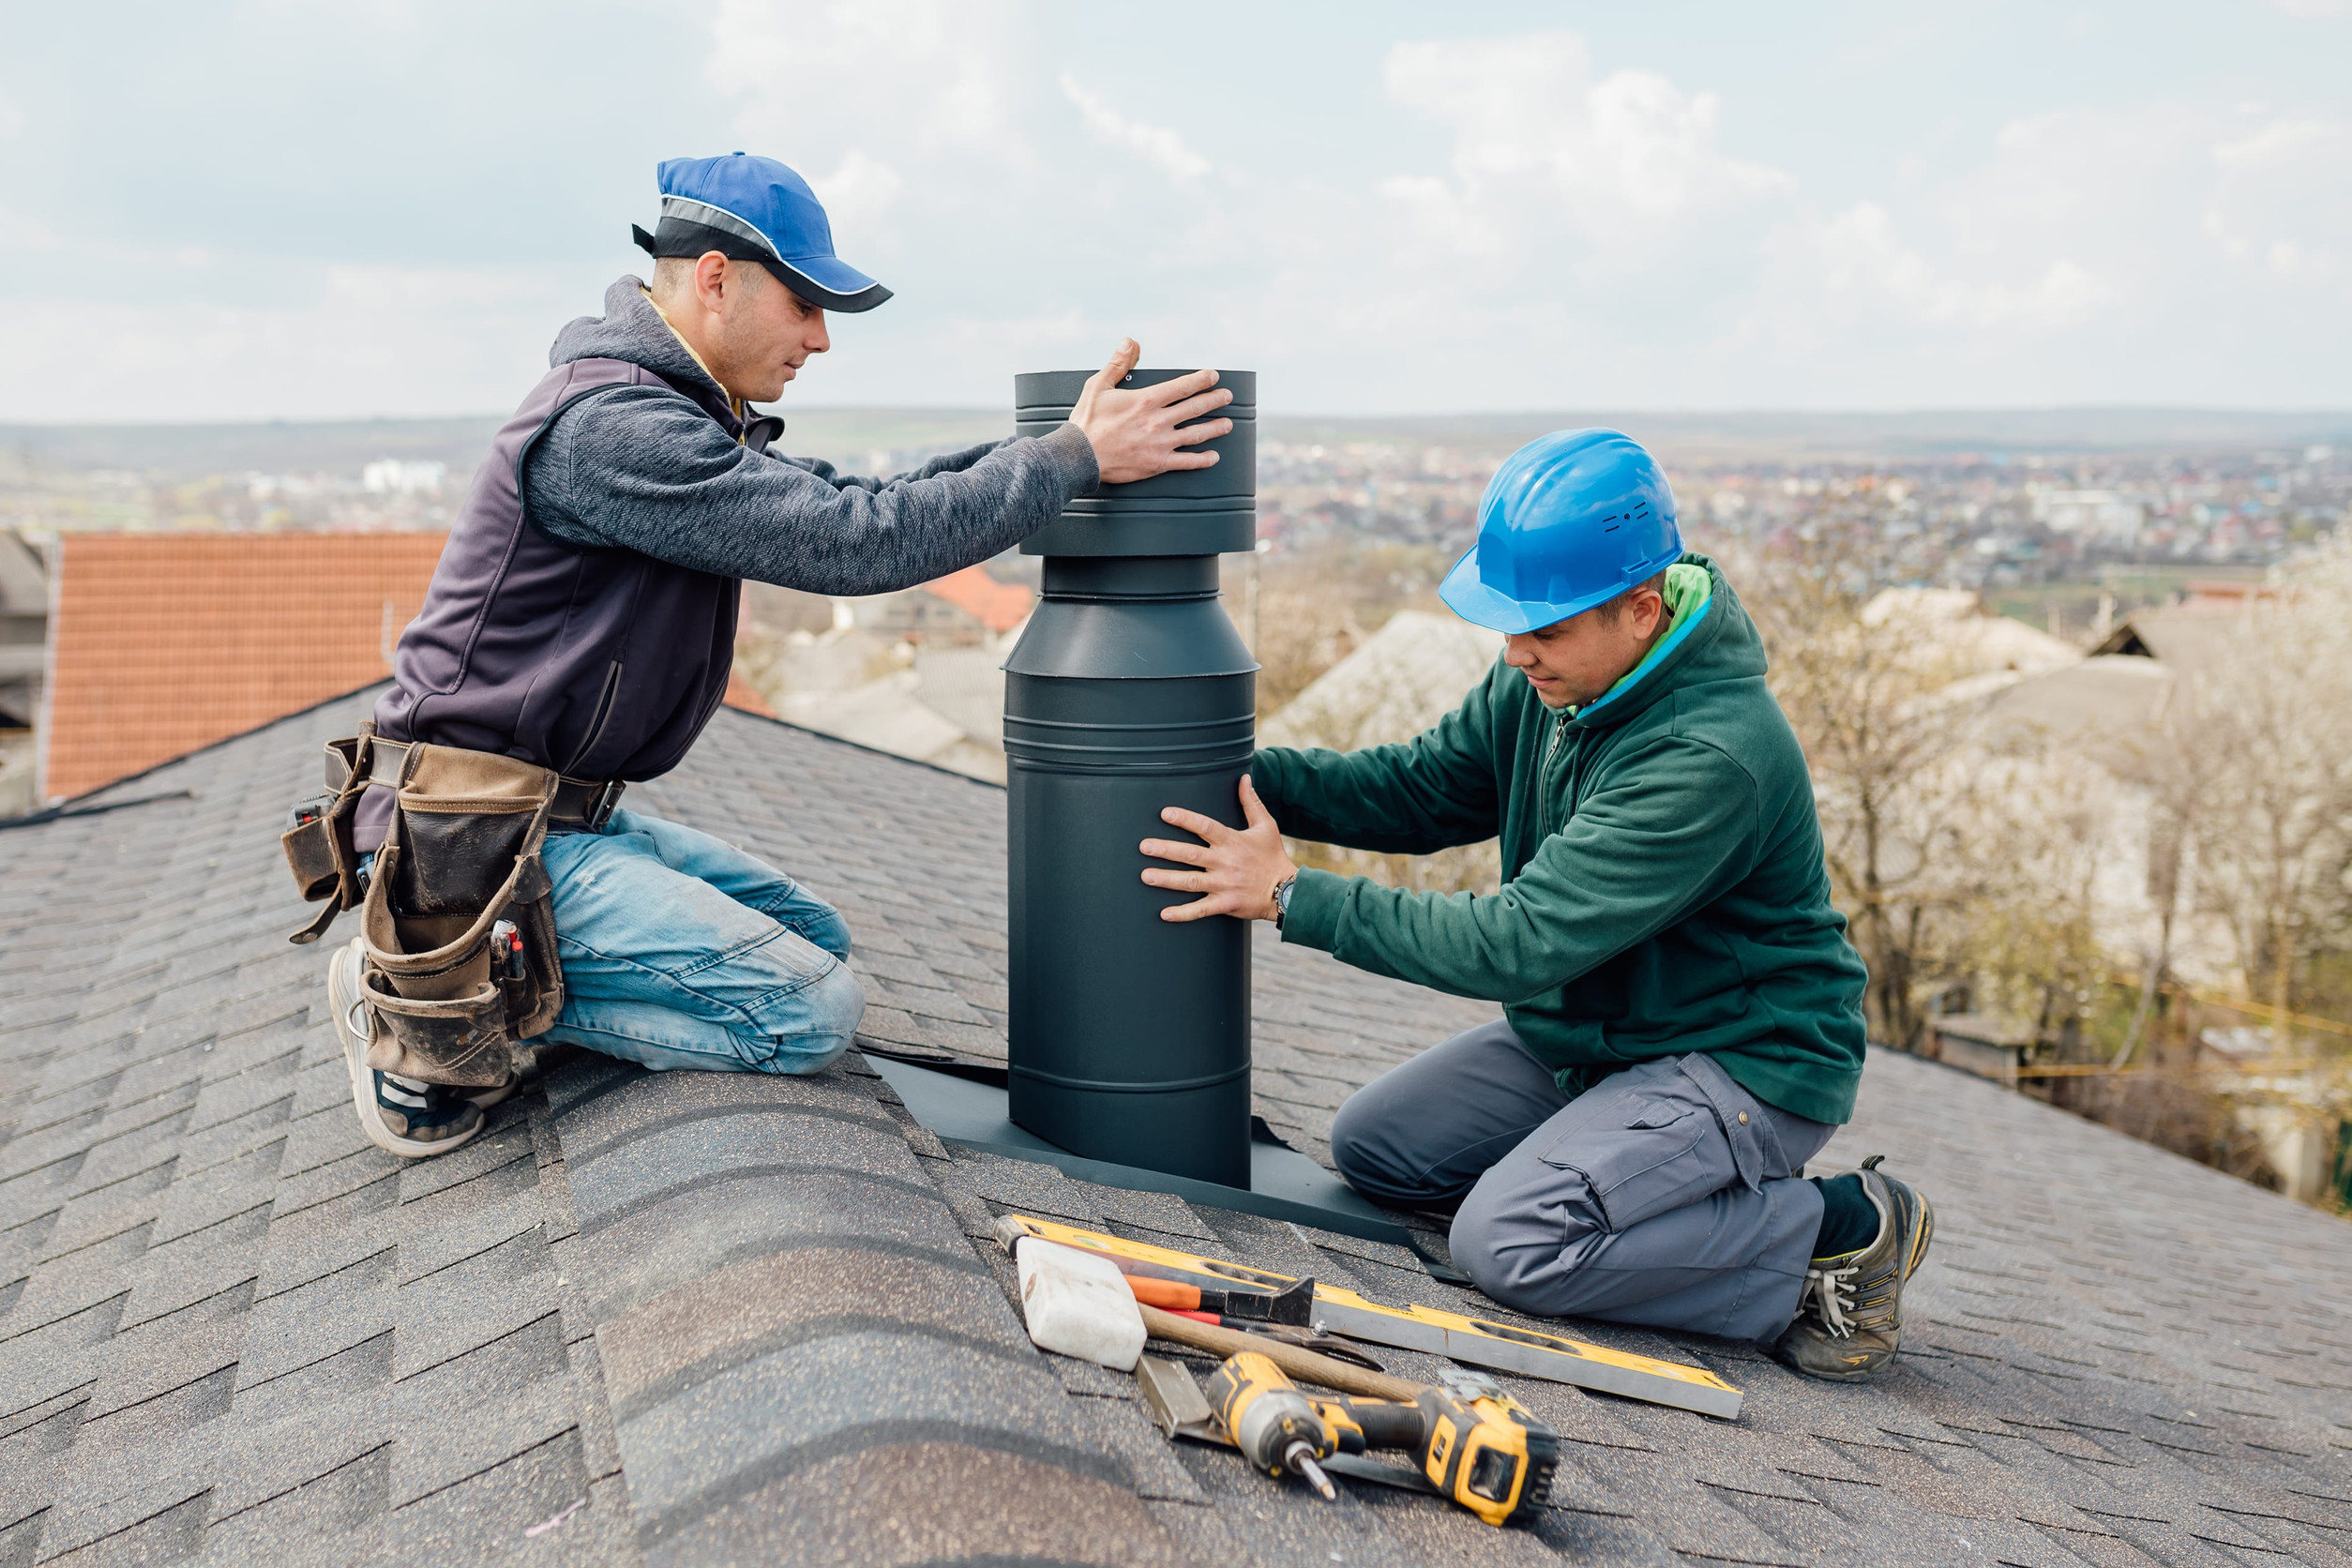
To fix a problem, you must first understand the anatomy of the components involved. A roof vent pipe boot (also referred to as a pipe flashing, plumbing boot, or collar) is a flexible sleeve designed to seal the circular gap where a plumbing stack emerges through the sloped plane of a roof.
A standard vent pipe boot consists of two primary elements:
- The Flashing Base (Flange): A wide, flat square made of aluminum, copper, galvanized steel, or heavy-duty plastic. This base slips underneath the shingles on the upslope side and sits on top of the shingles on the downslope side, routing water safely around the penetration.
- The Collar (Gasket): A flexible, conical rubber or silicone sleeve securely bonded to the center of the base. The inner diameter of this collar is engineered to stretch tightly around the exterior of the PVC, cast iron, or copper vent pipe, creating a friction-fit waterproof seal.
Common Materials Used in Vent Boots
- Plastic Base with Neoprene/EPDM Collar: This is the most widely installed modern standard in residential roofing. They are highly affordable and easy to install but feature the shortest lifespan (typically 8 to 12 years).
- Metal Base (Aluminum or Galvanized Steel) with Neoprene Collar: Offers a highly durable base that resists warping or cracking under extreme physical loads, though the rubber collar is still susceptible to atmospheric degradation.
- All-Copper or Lead Boots: Found on historic, high-end, or lifetime roofing installations (such as slate or tile). Instead of relying on a rubber gasket, a lead boot features a malleable neck that is manually rolled over the top lip of the vent pipe, creating a seamless, lifetime metal barrier that cannot rot.
2. Top Reasons Why Roof Vent Boots Fail
While modern architectural shingles are frequently rated to last 25 to 50 years, standard rubber vent boot collars rarely survive past the decade mark. This stark difference in longevity means your vent boots will likely need to be repaired or replaced at least twice during the lifespan of a single roof.
Understanding what causes these failures helps you anticipate maintenance intervals and catch issues before disaster strikes.
+-------------------------------------------------------------+
|               CHRONOLOGY OF A VENT BOOT FAILURE             |
+-------------------------------------------------------------+
|  Phase 1: UV Radiation & Thermal Expansion                  |
|  - Continuous sun exposure bakes the elastic polymers.      |
|  - Daily temperature swings flex the pipe against the boot.  |
+-------------------------------------------------------------+
|  Phase 2: Micro-cracking & Elastic Fatigue                  |
|  - The rubber hardens, losing its structural flexibility.    |
|  - Small hairline fractures open around the plumbing stack. |
+-------------------------------------------------------------+
|  Phase 3: Structural Breakdown                              |
|  - Cracks split wide open; rubber may flake or tear away.   |
|  - Animal interference or rusting fastners widen the breach. |
+-------------------------------------------------------------+
|  Phase 4: Active Water Infiltration                         |
|  - Driving rain runs down the pipe, directly into the attic.|
+-------------------------------------------------------------+
Dry Rot and UV Degradation
The absolute number-one killer of plumbing boots is direct sunlight. Ultraviolet (UV) radiation breaks down the chemical bonds of synthetic rubber compounds like neoprene. Over years of baking on a hot roof, the rubber loses its plasticizers, turning brittle, dry, and inflexible. Eventually, the rubber splits open, creating a direct pathway for rainwater to stream down the outside of the vent pipe.
Thermal Expansion and Contraction
Every day, your house expands and contracts as external temperatures rise and fall. Plumbing vent pipes—especially long PVC lines running from warm crawlspaces up through scorching attics—move up and down vertically as they expand and contract. If the rubber gasket has already been hardened by UV damage, it cannot flex with this movement. The physical stress tears the brittle rubber away from the pipe wall.
Improper Initial Installation
Roofing systems rely strictly on gravity to shed water. If a roof boot is installed out of sequence—such as exposing the upper edge of the metal flange over the top shingles rather than tucking it underneath—water will back up right under the flashing. Similarly, over-driven nails, under-driven fastners, or a total reliance on roofing caulk instead of proper mechanical weaving will cause early structural failure.
Pests and Wildlife Damage
Squirrels, raccoons, and birds can cause unexpected damage to roof penetrations. In cold weather, warm air continuously rises out of plumbing exhaust lines. Animals drawn to this heat will chew on lead boots or scratch at rubber collars, tearing away sections of the waterproof seal to clear space for nesting or to sharpen their teeth.
3. How to Diagnose a Vent Pipe Boot Leak
Because water is opportunistic, an active leak originating at a roof vent boot may manifest far away from the pipe itself. Water often enters through a torn collar, drips onto the sloping top of a rafter, and travels horizontally several feet before dropping onto your interior ceiling drywall.
Use these diagnostic strategies to confirm if a vent pipe boot is the true source of your water issues.
Interior Indicators
- Water Rings Near Bathroom Walls: Because plumbing vents are positioned inline with kitchens, bathrooms, and laundry rooms, look for ceiling discoloration, bubbling paint, or damp drywall near these specific interior walls.
- The "Rain-Only" Leak: If your ceiling only drips or darkens during heavy rainstorms, but dries out completely during clear weather, it is a classic sign of flashing failure rather than an interior plumbing pipe burst.
- Musty Odors in the Attic: If you have access to your attic, grab a flashlight during a heavy downpour and inspect the plumbing stacks. Look for wet insulation surrounding the base of the pipe or check the roof decking directly beneath the penetration for black tracking, wood rot, or active drips.
Exterior/Roof Inspection Indicators
If it is safe to climb onto your roof, or if you can use binoculars from ground level, look closely at the base of your plumbing pipes for:
- Visible horizontal or vertical cracks split across the rubber collar.
- Large chunks of rubber missing or peeling away from the metal pipe.
- The collar separating cleanly from the pipe, leaving a visible gap.
- Rust stains bleeding out from underneath the shingles surrounding the boot flange.
- Exposed, unsealed roofing nails that have backed out due to thermal movement.
4. Temporary Fixes vs. Permanent Repairs
When confronted with a leaky vent boot, homeowners must choose between a temporary patch and a permanent replacement.
The Pitfalls of Roofing Cement and Caulk
The most common mistake made by DIYers and cut-rate contractors is slathering a failing rubber boot with silicone caulk, polyurethane sealant, or black roofing cement (tar). While this may stop a leak for a few weeks or months, it is strictly a temporary band-aid.
Roofing tar dries out quickly, cracks under the sun, and traps moisture beneath its surface, which accelerates wood rot in the underlying plywood deck. Furthermore, silicone does not bond cleanly to dirty, oxidized neoprene rubber. Within one seasonal cycle, thermal movement will split your new caulk line wide open.
When to Patch, When to Overlay, and When to Tear Down
- Patching/Using a Boot Shield (Acceptable Intermediate Repair): If the flashing base is in pristine condition and tucked perfectly beneath the shingles, but the rubber collar is dry-rotted, you can install a specialized aftermarket rubber repair collar (collar shield) over the existing pipe to seal the damage.
- Full Replacement (The Gold Standard): If the base plate is warped, rusted, or plastic-cracked, or if the surrounding shingles are damaged, choosing between fixing structural components or scheduling a complete upgrade becomes critical. Homeowners weighing their options should look at a detailed repair or replace your roof cost guide to make the most financially sound long-term decision.
5. DIY Step-by-Step Guide: Replacing a Roof Vent Pipe Boot
If you are comfortable working at heights and possess basic hand tools, replacing a standard plumbing boot is a highly manageable weekend project. Executing this correctly can save you hundreds of dollars in professional labor fees.
Tools and Materials Required
Before climbing onto the roof, compile your toolkit to avoid unnecessary trips up and down the ladder:
- Safety Equipment: Roof harness, slip-resistant footwear, and safety glasses.
- Replacement Boot: Ensure you measure your vent pipe's outer diameter beforehand (most residential pipes are 2-inch, 3-inch, or 4-inch PVC or cast iron). Many modern boots feature a universal, multi-fit cut-to-size rubber collar.
- Flat Pry Bar (Pry Tool/Roofing Knife): Essential for separating shingle sealant lines without tearing the asphalt mat.
- Hammer & Roofing Nails: 1¼ inch galvanized roofing nails.
- High-Grade Outdoor Sealant: Polyurethane roofing sealant or specialized solar-grade tripolymer sealant (avoid cheap silicone).
- Utility Knife: For trimming shingles or clearing old caulk away.
Step 1: Loosen the Surrounding Shingles
Waterproofing relies on an overlapping pattern. To remove the old boot base, you must carefully free the shingles overlapping the top and sides of the flange.
Position your flat pry bar carefully beneath the shingles immediately above the vent pipe. Slide the tool gently upward to break the tar sealant strip holding the shingle layers together. Repeat this process for the shingles directly to the left and right of the plumbing boot. Proceed slowly; forcing cold, brittle shingles can snap them in half, turning a simple boot repair into a larger shingle replacement project.
       TYPICAL OVERLAPPING INSTALLATION PROFILE

                  [ SHINGLE LAYER ABOVE ]
               (Covers top edge of base flange)
             ____________________________________
            |                                    |
     =======|========   [VENT PIPE]   ===========|=======
            |                ||                  |
 [SHINGLE   |     ___________||___________       | [SHINGLE
   LEFT]   |    |    Collar (||)          |     |   RIGHT]
  Covers--->|    |      _____||_____      |     |<---Covers
   side     |    |     /            \     |     |    side
   edge     |    |    /  Base Flange \    |     |    edge
            |    |___/________________\___|     |
            |____________________________________|
                             ||
                  [ SHINGLE LAYER BELOW ]
               (Sits UNDER bottom edge of flange)
Step 2: Remove the Old Roof Fasteners
Once the shingles are loose and flexible, lift their edges to expose the nails anchoring the old boot flange to the wood deck.
Slide your pry bar beneath the metal or plastic base plate right next to each nail location. Leverage the bar upward to pop the nail heads free. There are typically four to six nails sealing the flange to the roof deck. Be sure to check the upper corners, which are hidden deep beneath the higher shingle courses.
Step 3: Slide the Failed Boot Off the Pipe
With all retaining fasteners removed and the shingles lifted back out of the path of travel, grasp the outer edges of the old flashing base.
Twist the boot slightly side to side to break any residual seal against the plumbing stack, then pull it vertically up and off the pipe. If an old layer of brittle caulk holds the rubber ring tight against the pipe collar, use your utility knife to carefully slice through the rubber ring along the vertical axis of the stack to slide it free.
Step 4: Prep the Roof Deck and Plumbing Stack
Do not install a pristine, brand-new flashing boot onto a filthy surface. Take a few minutes to complete these critical cleaning steps:
- Use a putty knife or flat bar to scrape away old lumps of roofing cement, residual caulk, or dirt built up on the exposed underlayment or surrounding shingles.
- Inspect the revealed plywood decking. If the wood is soft, dark, damp, or structurally compromised by dry rot, you must stop and replace that section of the deck before proceeding.
- Wipe down the vertical shaft of the plumbing pipe with a rag to clear away moss, rust, or debris that could compromise the friction seal of the new rubber collar.
Step 5: Install and Align the New Vent Boot
If using a universal cut-to-size boot, use your utility knife to trim the inner rubber ring along the pre-molded lines until it matches your pipe diameter. It should be slightly smaller than the pipe to guarantee a water-tight friction fit.
Apply a generous bead of premium polyurethane sealant to the underside of the replacement boot's base plate, tracing a continuous loop around the perimeter. Carefully slide the new boot downward over the plumbing vent pipe. Push down firmly until the base plate sits flat against the roof deck and underlayment.
Step 6: Weave the Base Plate into the Shingle Course
Properly orienting the flashing edges relative to your shingle rows ensures a continuous watershed:
- The bottom half of the flange must sit cleanly on top of the shingles directly down-slope from the vent stack.
- The top and side halves of the flange must slide cleanly underneath the shingle courses directly up-slope and sideways from the stack.
Verify that no shingles are bunched up, buckled, or folded backward during this alignment process.
Step 7: Fasten the Flange Securing System
Lift the overlapping shingles out of your way and drive galvanized roofing nails through the factory-punched mounting holes along the perimeter of the new base plate.
Drive your nails flush, taking care not to strike the base plate too hard, which can crack plastic frames or dimple thin aluminum flanges. Never drive nails directly through the exposed lower face of the flange; keep all fasteners confined to areas that will be covered by the upper shingle layers.
Step 8: Apply Final Waterproofing Seals
To complete your installation and add an extra layer of protection, perform these final sealing steps:
- Apply a bead of polyurethane sealant along the exposed seam where the top of the rubber collar tightly hugs the plumbing vent stack. Smooth the bead down with a gloved finger to form a clean, water-shedding collar seal.
- Place a small dab of sealant over any exposed nail heads that you pulled out or adjusted during the shingle loosening process.
- Apply small dollops of sealant to the underside of the shingles you pried loose in Step 1, then press them back down firmly to reactivate their wind-resistant bond.
6. Alternative DIY Solution: The "Zipper Boot" and Collar Sleeves
If your roof inspection reveals that the wide metal base plate is completely solid, rust-free, and seamlessly woven into the shingles, but the rubber collar has deteriorated, a full tear-out may be unnecessary. You can utilize an aftermarket vent pipe collar sleeve or a retro-fit zipper boot.
How a Retrofit Sleeve Works
A repair collar sleeve is an affordable neoprene ring molded into a miniature collar shape that mimics the top section of a standard boot.
- Thoroughly clean the exterior of the pipe and old rubber boot.
- Lubricate the inside of the repair sleeve with a small drop of dish soap.
- Slide the repair sleeve down over the pipe, pushing it all the way down until it completely caps and shrouds the cracked rubber collar beneath it.
This forms a durable secondary seal that diverts water away from the original cracks without disturbing any surrounding shingles.
       COLLAR REPAIR SLEEVE PROFILE (NO CUTTING REQ.)

                  ||              ||
                  || [VENT PIPE]  ||
                  ||              ||
             .----||--------------||----.
            /     ||  REPAIR      ||     \
           /  .---||--SLEEVE------||---.  \
          /  /    ||              ||    \  \
         /  /     ||  Original    ||     \  \
        /  /      ||  Cracked     ||      \  \
   ____/  /_______||__Collar______||_______\  \____
  [     '/        ||              ||        \'     ]
  [               ||  Base Plate  ||               ]
7. When to Call a Professional Roofing Contractor
While swapping a plumbing boot is a highly accessible project on a low-slope ranch home, certain scenarios present complications that warrant hiring a licensed professional.
Complex Architectural Settings
- High-Pitch Roofs: If your roof pitch is steep (greater than a 6:12 slope), working safely requires specialized safety equipment, staging platforms, and roof jacks.
- Slate, Tile, or Metal Roofs: These delicate premium materials require specialized disassembly techniques. Stepping on clay tiles or slate shingles without cracking them requires specialized weight-distribution boards and deep technical experience.
Advanced Structural Defects
If you remove an old boot and discover black, crumbling, or water-logged wood decking that extends far beyond the immediate footprint of the pipe flange, a simple replacement is no longer enough. Before kicking off an extensive repair project like this, it is highly recommended to review a comprehensive roofing company checklist to verify that your selected team holds the right licensing, insurance, and reputation to ensure code compliance.
A professional team will need to surgically cut out the damaged roof deck, install structural sister rafters, lay new underlayment, and stitch the shingle patterns back together properly to preserve your home’s structural integrity.
8. Proactive Maintenance Tips for Roof Penetrations
A minor amount of preventative maintenance can help you avoid costly interior ceiling repairs down the road. Use these strategies to maximize the lifespan of your roof's penetrations:
- Conduct Bi-Annual Inspections: Every spring and autumn, take a look at your roof lines with a pair of binoculars or perform a quick drone inspection. Look closely for signs of weather wear or animal activity around all roof penetrations.
- Paint PVC Pipes: Untreated PVC plumbing pipes degrade under intense sunlight over time. Painting your exposed white plumbing stacks with a high-quality, exterior-grade latex paint protects the plastic from UV rays and helps it blend into your shingle colors.
- Understand Seasonal Timing: If you anticipate needing a broader roofing overhaul alongside your boot repair, planning around local climate factors is key. Reviewing the best time of year to replace a roof can help you avoid severe seasonal storms and lock in competitive local labor rates.
- Install Wildlife Protective Caps: If squirrels or raccoons frequent your property, install wire mesh or heavy-duty galvanized guards over your plumbing vents to keep pests from nesting or chewing through your pipe seals.
9. Long-Term Value and Protection
Addressing leaky pipe boots early does more than prevent water spots; it protects the long-term value of your home. Minor, unaddressed leaks can quickly compromise your attic and structural beams, showing up as red flags during future real estate transactions.
For home owners considering a future sale, understanding how structural upkeep impacts property metrics is incredibly valuable. Take a look at our breakdown on how a new roof adds home value to see how professional maintenance impacts ROI, appraisals, and overall market resale power.
Summary Reference Table: Vent Boot Repair vs. Replacement
By taking the time to understand the structural importance of your roof's vent pipe boots and monitoring their condition over time, you can intercept leaks early. Whether you decide to tackle a replacement yourself using basic hand tools or bring in a licensed local crew to handle high-pitch slopes, keeping your roof penetrations watertight is one of the smartest, most cost-effective investments you can make to protect your home's equity.
More Articles

Questions to Ask a Roofer: 20 Must Ask Items Before Signing Today

How to Compare Roofing Quotes: Apples to Apples Price Guide Today

Drip Edge Installation: Why Code Requires It in Many Areas Today in East TN

Best Roof Sealants for Leaks: Which Products Actually Last Today