Winter in East Tennessee and across the country brings a unique set of challenges for homeowners. While snow-covered roofs can look picturesque, they often hide a destructive winter phenomenon: ice dams.
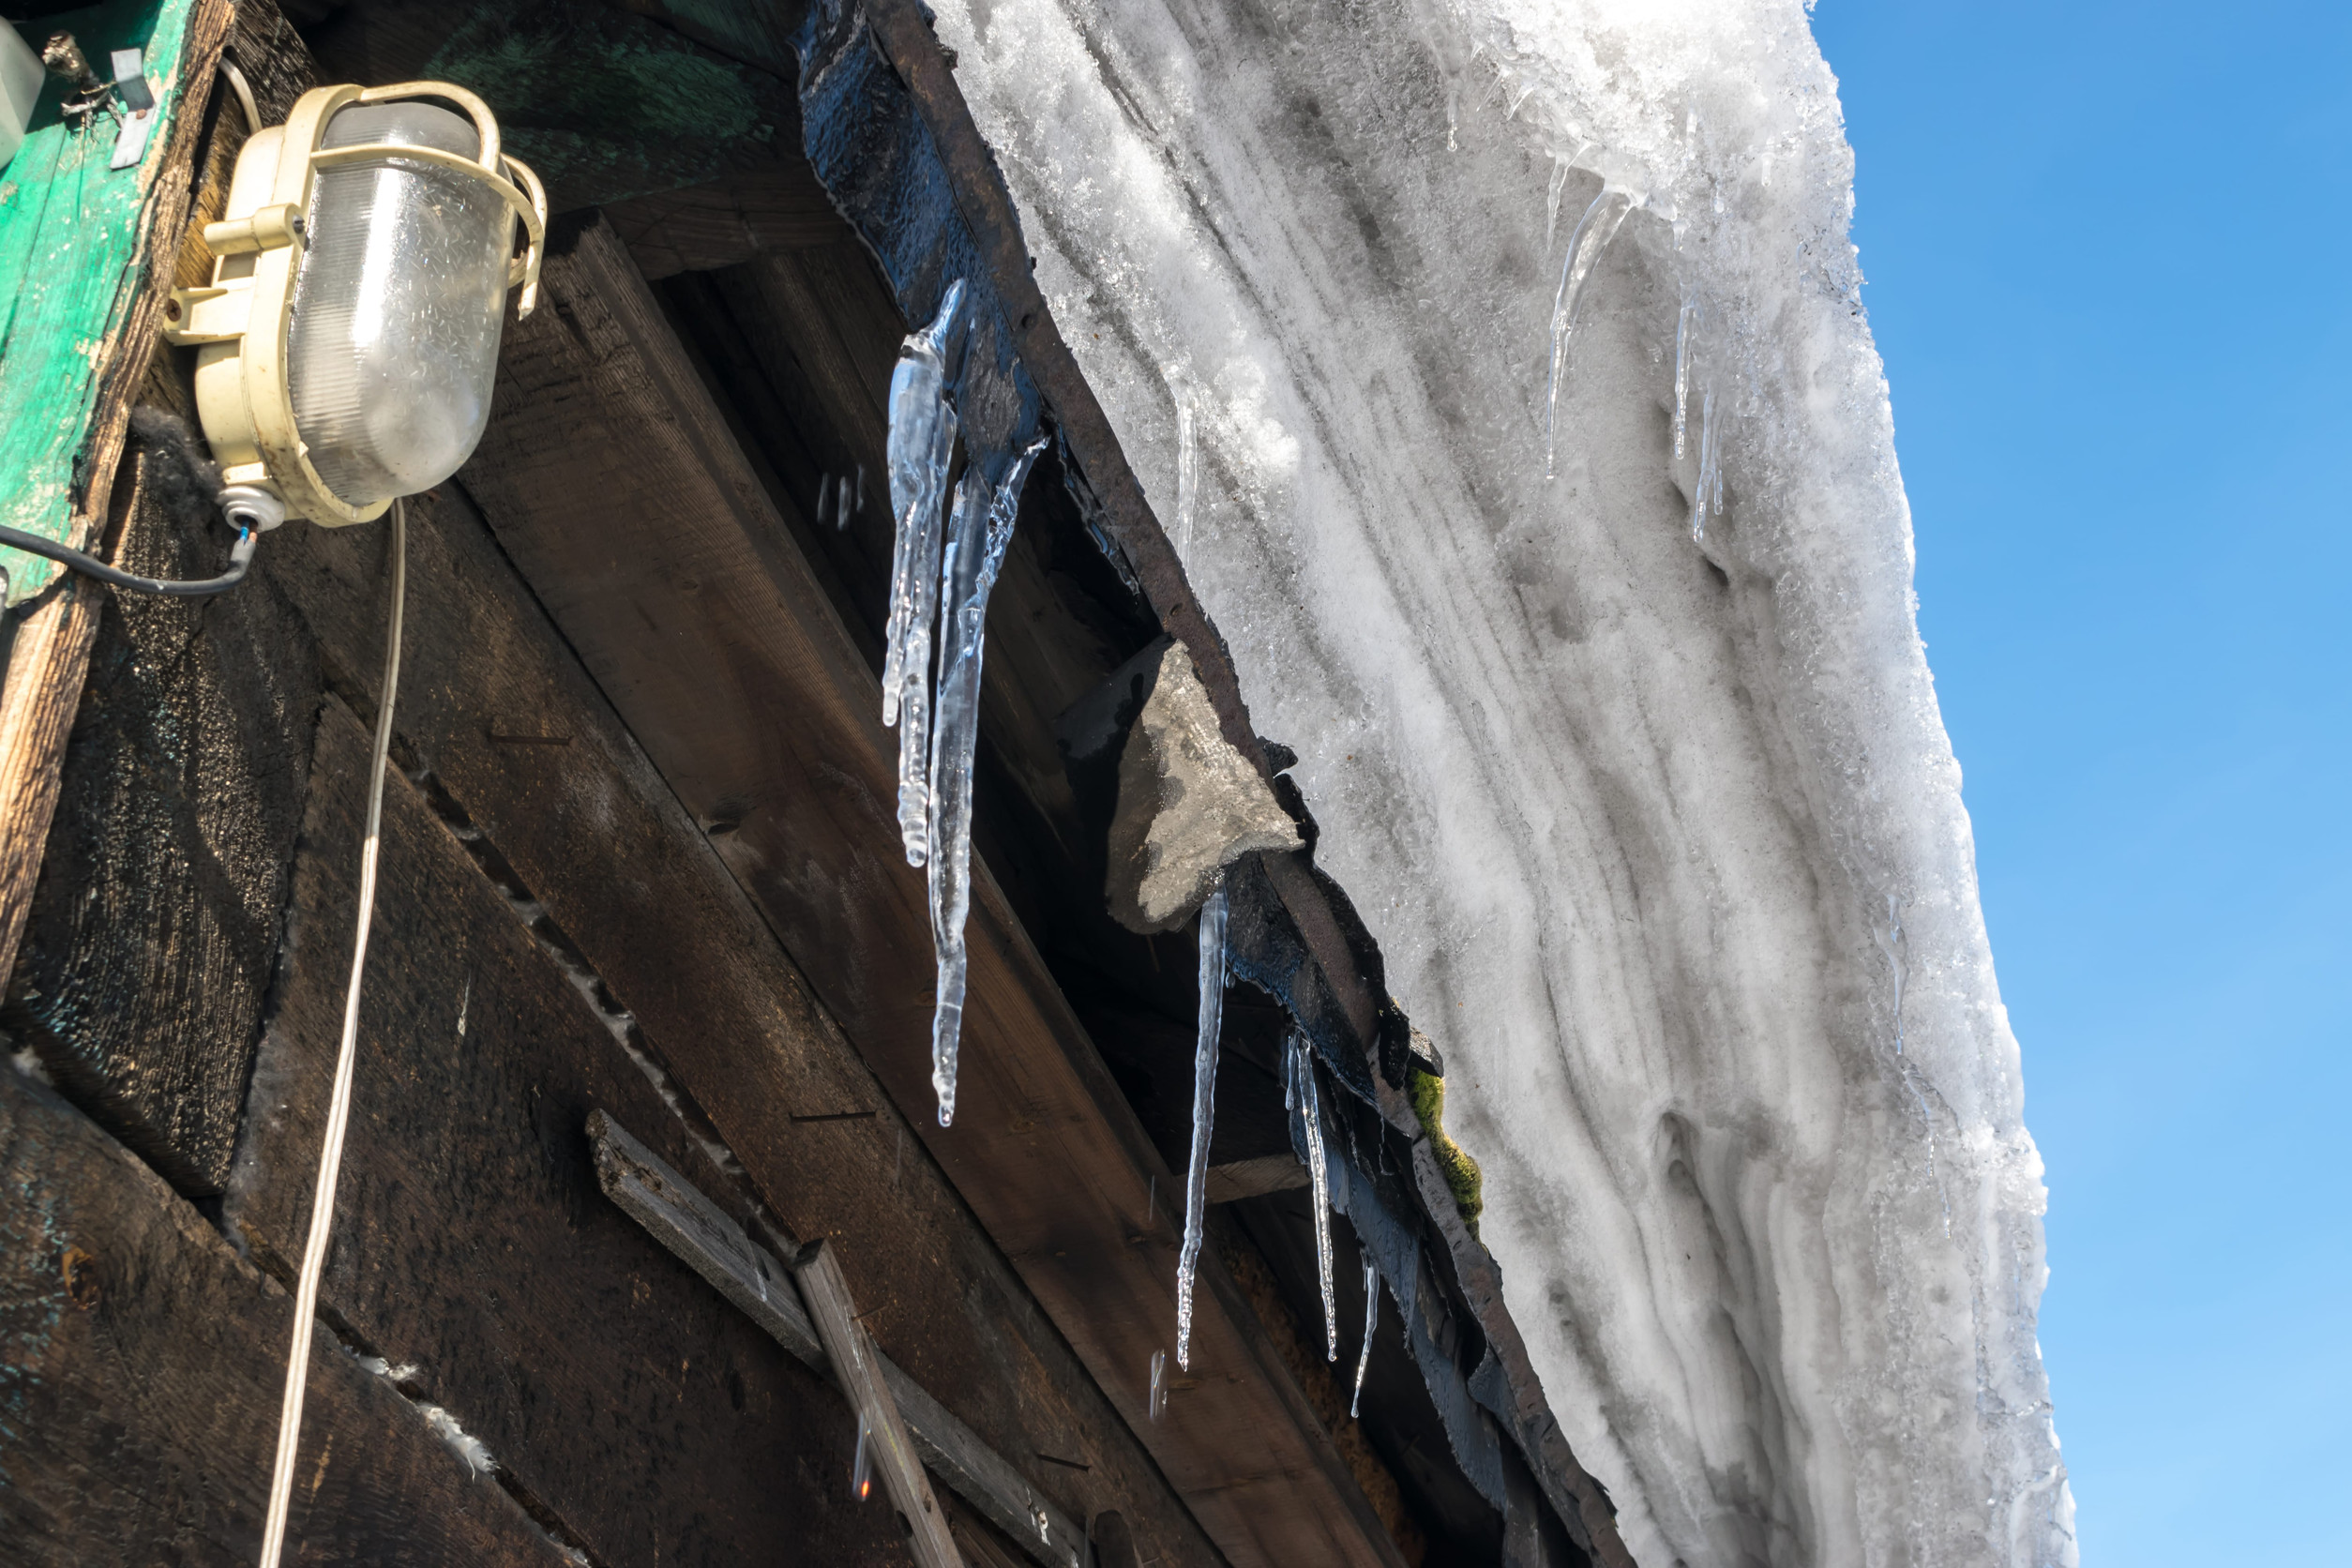
An ice dam is a thick ridge of solid ice that forms along the eaves and gutters of a home. As snow melts on upper sections of the roof, the runoff flows down to the cold roof edge, where it refreezes. This process repeats, creating a growing barrier of ice that prevents subsequent meltwater from shedding off the roof structure. Trapped water backs up behind the ice dam, leaking under shingles, soaking roof decking, destroying insulation, and causing massive drywall damage inside your home.
Preventing ice dams is not about treating the ice itself; it is about managing the thermal performance of your entire roofing system. This comprehensive guide details the mechanics of ice dams, explains how to diagnose vulnerabilities, and outlines modern prevention strategies focused on venting, attic insulation, and professional roof care.
1. The Anatomy of an Ice Dam: How and Why They Form
Ice dams are entirely caused by uneven roof temperatures. They are not a function of the weather outside, but rather a structural problem related to heat loss from the living spaces directly below the roof.
       THE THERMAL CYCLE OF AN ICE DAM

               Warm Air Escapes Attic
                     |      |
                     v      v
                 [ Warm Upper Roof ]  <--- Snow melts here
                   \             /
                    \  Meltwater \
                     \   Flows    \
                      \   Down     \
                       \____________\
                       [ Cold Eave ] <--- Water refreezes into an ICE DAM
                            ||
                         [Gutter]
The process follows a specific chronological sequence:
- Heat Infiltration: Warm air from your heated living space escapes into the attic due to poor insulation or unsealed bypasses.
- Upper Roof Melting: This escaped heat warms the roof decking above the main attic space, causing the bottom layer of snow accumulation to melt, even when outdoor temperatures are well below freezing.
- Runoff Flow: Meltwater flows down the sloped roof, underneath the snow blanket, traveling toward the lower edge of the roofline.
- The Freeze Zone: When the water reaches the eaves, overhangs, or gutters, it enters an area of the roof that has no heated living space underneath it. The temperature of this roof edge matches the freezing outdoor air.
- Dam Creation: The water refreezes on the cold eave, forming a physical ridge of ice. As more snow melts above, more water pools behind this frozen ridge, eventually backing up into the shingle courses.
2. The Destructive Impact of Ice Dam Infiltration
Many homeowners ignore ice dams, assuming they will simply melt away in the spring. However, the water trapped behind an ice dam does not flow uphill; it pushes horizontally and upward under the overlapping shingle rows.
Structural Rot and Sheetrock Failure
As water penetrates the shingle layers, it saturates the underlying roof underlayment and plywood decking. Over time, chronic moisture exposure leads to wood rot, weakening the structural integrity of your roof rafters. Once the water passes through the wood deck, it saturates your ceiling insulation, destroys its thermal resistance, and leaks into the drywall ceiling, causing sagging, water stains, and peeling paint.
Toxic Mold Proliferation
A hidden roof leak provides the perfect dark, damp environment for mold and mildew spores to thrive. Within 24 to 48 hours of water infiltration, toxic mold can begin to colonize attic beams and drywall panels, presenting significant health hazards to your family and requiring expensive professional remediation.
Gutter and Eave Collapse
The sheer weight of a thick ice dam combined with frozen, water-logged gutters can create immense physical stress. This excessive load can pull gutter brackets clean out of the fascia boards, warp your aluminum trough lines, and crack structural eave molding. When evaluating options to address these vulnerabilities, reviewing a comprehensive repair or replace your roof cost guide can help you determine whether localized fixes or a broader system overhaul makes the most financial sense.
3. The Trifecta of Prevention: Insulation, Venting, and Roof Care
True ice dam prevention requires a holistic approach that treats the house as an interconnected thermal system. The goal is simple: keep the entire roof deck at a uniform temperature that matches the outdoor air. This is accomplished through three pillars of home defense.
4. Pillar One: Advanced Attic Insulation and Air Sealing
Insulation acts as a thermal barrier that traps heat inside your home during winter. If your insulation is thin, uneven, or degraded, heat will continually bleed into your attic space, creating the dangerous thermal gradients that drive ice dam formation.
Calculating R-Value and Depth
For homes in East Tennessee and similar climates, the Department of Energy recommends an attic insulation rating between R-38 and R-60. If you use standard fiberglass blown-in insulation, this translates to a depth of roughly 12 to 15 inches. If your attic floor reveals exposed joists or shallow insulation pockets, you are losing valuable heat and actively contributing to roof freeze cycles.
The Critical Role of Air Sealing
Simply adding more insulation over a drafty ceiling will not stop ice dams. Air bypasses—small gaps, cracks, and penetrations in your ceiling floor—allow warm indoor air to stream into the attic via convection. Critical air sealing points include:
- Attic Access Hatches: Uninsulated scuttle holes and pull-down ladders act like chimneys for warm air. Install specialized foam weatherstripping and cover the top of the hatch with an insulation box.
- Plumbing Stacks and Chases: The vertical shafts carrying sewer lines and electrical conduits up from your basement or crawlspace often feature wide air gaps where they pass through top plates. Seal these voids using expanding polyurethane foam or fire-rated caulk.
- Recessed Can Lights: Standard recessed light fixtures generate significant heat and feature unsealed vents that dump warm air directly into the attic. Swap old fixtures for airtight, IC-rated (Insulation Contact) LED can covers that can be safely buried under insulation blankets.
5. Pillar Two: Balanced Attic Ventilation Architecture
Ventilation is the mechanical twin to insulation. While insulation minimizes the amount of heat entering the attic, ventilation uses natural airflow to sweep away any residual warm air, keeping the roof deck cold and dry.
A properly engineered ventilation system requires a perfect 1:1 balance between intake air and exhaust air.
       BALANCED ATTIC VENTILATION SYSTEM

                 [Ridge Vent] <--- Exhausts Hot Air Out
                      /\
                     /  \
                    /    \
                   / Attic\
                  /________\
         [Soffit Vent]     [Soffit Vent]
               ^                 ^
               |                 |
         Intakes Cold      Intakes Cold
          Outdoor Air       Outdoor Air
Soffit Vents (Air Intake)
Located underneath the roof overhangs (eaves), soffit vents act as the primary intake point for cool, fresh outdoor air. As wind hits the side of your home, it flows up through the soffit vents and enters the lowest point of the attic space.
Baffles and Airway Clearances
A common roofing mistake occurs when installers pack blown-in insulation tightly against the outer roof perimeter, completely blocking the soffit vents. To maintain clear airflow paths, install rigid plastic or cardboard insulation baffles (also called rafter vents) between every roof rafter. These channels prevent insulation from drifting into the soffit cavities while providing a clear highway for fresh air to slide over the underside of the roof deck.
Ridge and Gable Vents (Air Exhaust)
As the cool intake air enters through the soffit vents, it naturally warms slightly, picks up atmospheric moisture, and rises toward the peak of the roof. An open ridge vent running along the topmost peak of your shingle lines allows this rising air to escape cleanly back into the atmosphere. This continuous cycle ensures that the temperature of your roof plywood remains identical from the bottom eave to the top ridge line.
6. Pillar Three: Proactive Roof Care and Design Standards
While insulation and venting provide internal, systemic protection against thermal imbalances, external roof care ensures that your shingles and drainage systems can successfully handle harsh winter weather elements.
Professional Inspections and Structural Upkeep
Before freezing winter fronts move into the region, having your roofing system professionally inspected can catch vulnerabilities early. Small defects like loose shingle courses, damaged valleys, or failing vent boots will quickly expand into major leaks when subjected to freezing water back-ups.
When choosing a crew to inspect or repair these external elements ahead of winter, navigating your options requires diligence. Referencing a strict roofing company checklist helps you cross-verify proper licensing, liability insurance, and customer satisfaction metrics to ensure your home stays protected against the elements.
Gutter Debris Management
Gutters do not cause ice dams, but clogged, leaf-filled gutters will significantly accelerate their growth. When autumn leaves block downspout openings, standard rain runoff and early winter slush fill the gutter trough. As soon as temperatures drop below 32°F, this standing water freezes into a solid block of ice, creating an immediate physical obstacle that forces subsequent snowmelt back up onto your shingles. Clean your gutter lines thoroughly after the final autumn leaf drop to ensure an unobstructed path for water drainage.
The Best Strategic Timing for Upgrades
If your roof is old and structurally prone to chronic ice dam issues due to complex architectural valleys or low pitches, upgrading your roof before deep winter sets in is highly advantageous. Planning these large-scale enhancements around local weather patterns is essential to avoid project delays. Reviewing our regional guide on the best time of year to replace a roof allows you to dodge seasonal freezing cycles and capture prime labor rates.
7. Short-Term Remediations: What to Do If An Ice Dam Forms
If you are already dealing with an active ice dam on your roof edge, structural modifications like insulation and air sealing must wait until spring. However, you must handle active blockages carefully to avoid damaging your home or voiding your product warranties.
Safe Ice Melting Strategies
- The Calcium Chloride Sock Trick: Fill a nylon stocking with calcium chloride ice melt crystals (do not use standard rock salt, which will corrode aluminum gutters, kill landscaping, and stain shingles). Tie off the end and lay the sock vertically across the ice dam, overlapping the edge of the gutter. The calcium chloride will safely melt a vertical channel through the ice barrier, allowing the trapped pool of meltwater to drain off the roof.
- Professional Steam Extraction: The absolute safest way to remove a large, hazardous ice dam is to hire a professional roof steaming company. They use specialized, low-pressure high-temperature steam machines to cut the ice into manageable chunks without gouging the shingle granules or cracking your gutters.
Practices to Avoid
- Never Use Axes or Hammers: Smashing an ice dam with a crowbar, mallet, or shovel will crack cold, brittle asphalt shingles, puncture your roof underlayment, and split your gutter metal.
- Avoid Pressure Washers: High-pressure cold water blasts will strip the protective ceramic granules right off your shingles, leaving the asphalt core exposed to rapid UV deterioration.
8. Modern Upgrades: Ice and Water Shield Membranes
If you are currently scheduling a roof replacement or extensive repairs, you can install a modern layer of defense known as ice and water shield underlayment.
Standard felt underlayment is held down by roofing nails, creating thousands of tiny pinholes across your roof deck. Ice and water shield is a rubberized, polymer-modified asphalt membrane featuring a self-adhesive peel-and-stick backing. When rolled across the bottom edges of your roof deck, this membrane adheres directly to the raw plywood.
When a roofing nail is driven through this rubberized underlayment, the modified asphalt seals tightly around the shaft of the nail, forming an absolute waterproof gasket. Building codes require this self-adhering membrane to extend from the lowest eave edge to a point at least 24 inches inside the interior heated wall line, ensuring that even if an ice dam forms and pools water, the moisture cannot penetrate the wood structure beneath.
9. Long-Term Financial and Property Protection
Investing the time and capital into managing attic air leaks, enhancing insulation, and maintaining clean gutter tracks protects more than just your interior ceilings; it protects your home's equity. Chronic ice damming leaves tell-tale tracking marks across roof framing that real estate inspectors immediately flag during a sales window.
For homeowners planning for future transitions, protecting these foundational systems directly translates to strong market position. Reading our detailed analysis on how a new roof adds home value highlights how proper thermal management and robust structural upkeep can maximize your ROI, secure flawless appraisals, and increase buyer confidence when it comes time to list your property.
Summary Troubleshooting Matrix for Roof Ice Management
By mastering the balance between solid attic insulation, unrestricted ventilation paths, and disciplined exterior property maintenance, you can transform your home into an ice-dam-resistant structure. Whether you execute minor air sealing fixes yourself or collaborate with a certified professional crew to optimize your roof ventilation contours, keeping your attic cool and dry is one of the most effective ways to preserve your property’s equity through the worst of winter.
More Articles

Questions to Ask a Roofer: 20 Must Ask Items Before Signing Today

How to Compare Roofing Quotes: Apples to Apples Price Guide Today

Drip Edge Installation: Why Code Requires It in Many Areas Today in East TN

Best Roof Sealants for Leaks: Which Products Actually Last Today